Why a Fan Duct Matters for Your Tevo Tarantula
Upgrading your Tevo Tarantula with a fan duct is one of the most impactful modifications you can make. A well-designed fan duct significantly improves the quality of your 3D prints. The Tevo Tarantula, like many 3D printers, benefits greatly from focused cooling. The stock cooling solution, if any, often leaves much to be desired. A fan duct directs airflow precisely where it’s needed, primarily onto the freshly extruded plastic. This targeted cooling is crucial for achieving sharp details, preventing common printing issues, and ultimately, producing higher-quality prints. Without adequate cooling, prints can suffer from a range of problems that compromise both aesthetics and structural integrity. Therefore, investing time and effort in a fan duct is a worthwhile endeavor for any Tevo Tarantula owner seeking to elevate their printing game.
Improved Print Quality
The most immediate benefit of a fan duct is a noticeable improvement in print quality. By directing airflow directly onto the printed layers, the fan duct ensures that the plastic cools quickly and evenly. This rapid cooling helps to solidify the extruded plastic, preventing it from drooping or deforming before the next layer is applied. Fine details, such as overhangs and bridges, are printed more accurately. Sharp corners and edges become crisper, and the overall surface finish of the prints is smoother. This enhanced precision allows for more complex and intricate designs to be printed successfully, opening up a wider range of possibilities for your Tevo Tarantula.
Preventing Warping

Warping is a common problem in 3D printing, especially when printing with materials like ABS or even large prints with PLA. It occurs when the printed part shrinks unevenly as it cools, causing the edges to lift from the print bed. A fan duct can significantly mitigate warping by ensuring consistent cooling across the entire printed surface. This even cooling helps to minimize thermal stress, preventing the edges of the print from curling upwards. By addressing this issue, a fan duct increases the success rate of your prints, reducing the likelihood of failed prints due to warping. You’ll find that your prints adhere to the bed more effectively, resulting in a more reliable and satisfying printing experience. This is especially important for larger prints where warping is more likely to occur.
Faster Cooling
Beyond preventing warping and enhancing detail, a fan duct contributes to faster cooling times. The focused airflow from the fan duct accelerates the cooling process, allowing you to move on to the next layer more quickly. This can reduce the overall print time, especially for parts with complex geometries or small features. While faster cooling isn’t always desirable (as it can sometimes lead to other issues like layer adhesion problems, which needs to be considered when optimizing), in many cases, it helps to optimize print speed. The right balance of cooling, achieved through a well-designed fan duct, can significantly boost your printing efficiency without sacrificing quality.
5 Awesome Fan Duct Upgrades for Tevo Tarantula
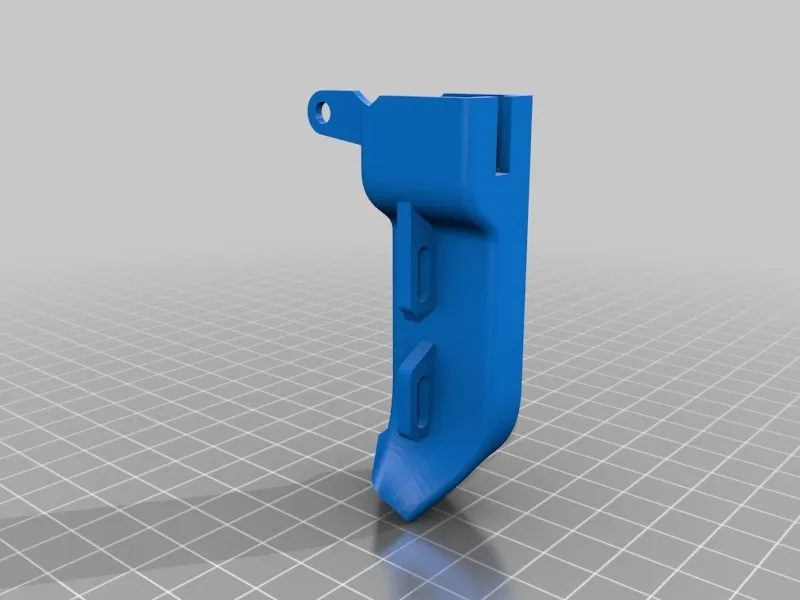
Upgrade 1 Optimized Airflow Design

The design of the fan duct is the first critical upgrade to consider. Look for fan ducts that are specifically designed for the Tevo Tarantula and that feature optimized airflow characteristics. These ducts will direct the airflow precisely where it’s needed, such as the nozzle. The design can affect how efficiently the cooling is applied. Some designs incorporate features like a converging nozzle or strategically placed vents to ensure the airflow is focused, even, and maximizes cooling performance. This leads to better print quality by effectively and efficiently cooling the extruded plastic as it is deposited. Look for designs that utilize computational fluid dynamics (CFD) simulations to achieve the best possible airflow.
Upgrade 2 Better Material for Heat Resistance
The material used to construct the fan duct is another critical aspect to consider. Because the fan duct is mounted near the hot end, it must be made of a material that can withstand high temperatures without deforming or melting. Common materials include PETG or ABS, which can withstand the heat of the nozzle. The choice of material will impact the lifespan and performance of the fan duct. Choose a material that is known for its heat resistance, stability, and durability to ensure reliable and long-lasting performance from your fan duct. Consider the printing environment; if printing in an enclosure, higher temperature resistance may be required.
Upgrade 3 Easy Installation
The ease of installation is a crucial factor in the selection of a fan duct. Choose a design that is simple to install and requires minimal modifications to your Tevo Tarantula. Many fan ducts are designed to replace the existing fan shroud with only a few screws. Look for clear instructions and readily available mounting hardware. Ease of installation is a critical factor because it ensures that you won’t waste time wrestling with complex setups. Choose designs that use existing mounting points, avoid cutting or drilling, and require only simple tools. Ensure that the installation does not compromise the printer’s functionality or require extensive disassembly. This will make the upgrade process more pleasant and faster. Easy installation makes the upgrade process more straightforward, allowing you to get back to printing quickly.
Upgrade 4 Improved Fan Mounting

The way your fan is mounted on the fan duct can greatly impact performance. Some designs offer better fan mounting options. This could mean a more secure fit for the fan, reduced vibrations, and even the ability to easily swap out fans for different types or performance characteristics. A secure and stable fan mount ensures efficient airflow and prevents the fan from rattling or dislodging during printing. Consider the size of the fan and any available options, allowing for future upgrades to more powerful fans for improved cooling capabilities. A well-designed mounting system enhances the overall effectiveness of your fan duct. It will ensure that your chosen fan stays in place and functions optimally. Make sure your fan is securely mounted and not vibrating excessively.
Upgrade 5 Dual Fan Setup
For even greater cooling performance, consider a fan duct that supports a dual-fan setup. Two fans will significantly increase the airflow directed at the printed part, resulting in faster cooling and improved print quality, particularly for challenging prints. The dual-fan setup allows for more focused cooling, especially around complex geometries, bridges, and overhangs. Dual fans can often maintain this level of cooling across wider print areas compared to a single fan. While dual fans may require more power, the benefits in terms of print quality and speed can often outweigh the added energy consumption. Ensure your power supply can handle the additional load. This upgrade is especially beneficial for materials that require more aggressive cooling, such as PLA, but can improve print quality across a range of materials.
Choosing the Right Fan Duct for Your Tevo Tarantula
Choosing the right fan duct for your Tevo Tarantula involves considering several factors, including design, material, and ease of installation. Research different models and read reviews from other users to determine which options best suit your needs and printing style. Consider the specific requirements of the materials you typically print with. For example, PLA usually benefits from more aggressive cooling than ABS. Look for fan ducts that are specifically designed for the Tevo Tarantula. The perfect fan duct will balance performance, ease of installation, and durability, enhancing the quality of your prints. Make sure to carefully evaluate the design. The materials should be resistant to the heat. The installation process needs to be simple. Make an informed decision based on your specific needs and printing preferences to improve your 3D printing experience.
Considerations for Design

When evaluating a fan duct’s design, pay close attention to the airflow characteristics. The duct should direct airflow in a focused manner, ensuring that it cools the extruded plastic evenly and efficiently. Consider the angle and direction of the airflow, and whether the design includes features to concentrate the air onto the print. A well-designed fan duct will minimize airflow resistance, allowing the fan to operate at its maximum potential. Look for designs that have been optimized through CFD simulations or user feedback. A well-designed fan duct will not only cool your prints effectively. It also should not obstruct the movement of your printer’s nozzle or interfere with any other components.
Material Selection
The material of your fan duct should be heat-resistant. PETG or ABS are good choices. These materials can withstand the heat generated by the hot end. Selecting the wrong material may lead to the fan duct deforming or melting. Consider the long-term durability of the material, and its resistance to wear and tear. Some materials may be more prone to cracking or warping over time. The material should be resistant to the chemicals used in the 3D printing process. It should remain stable over a long period. This ensures that the fan duct will continue to perform effectively throughout its lifespan. Consider how easy the material is to clean and maintain.
Installation Process
Before purchasing, research the installation process. A straightforward and simple installation is preferable. Ensure that the fan duct is compatible with your Tevo Tarantula model. Verify that it includes all the necessary hardware. Check the instructions to ensure that they are clear and easy to follow. Complex installation processes can be time-consuming and frustrating. Choose a fan duct that does not require you to make significant modifications to your printer. This will allow you to get back to printing quickly. A well-documented and easy installation process will save you both time and effort. It will give you a better experience with the upgrade.
Tips for Success

Once you’ve installed your new fan duct, there are some tips to ensure success. First, calibrate the cooling settings in your slicer software. Adjust fan speeds to optimize the airflow for different materials and print settings. Start with lower fan speeds for materials like ABS to prevent warping, and increase fan speeds for materials like PLA to improve detail. Experiment with different fan speeds to find the optimal balance between print quality and print speed. Monitor your prints, especially during the initial layers, to ensure the fan duct is functioning as intended. Adjust the fan duct’s position if necessary to optimize the airflow for your specific printing needs. Be patient, and adjust the settings until you achieve the best results. This will lead to the best possible prints.
Troubleshooting Common Issues
Even with a well-designed fan duct, you may encounter issues. If you experience layer separation or poor layer adhesion, the fan speed may be too high, especially for certain materials. Reduce the fan speed or increase the nozzle temperature. If you notice warping, ensure your print bed is level, and use a brim or raft to improve adhesion to the print bed. If the fan duct is interfering with the nozzle or any other parts of the printer, adjust the mounting or the position of the fan. Regularly inspect the fan duct for any signs of damage. Replace it immediately if it cracks or melts. By troubleshooting and making adjustments, you can ensure optimal performance and quality from your fan duct.
Maintaining Your Fan Duct
Regular maintenance of your fan duct will help to prolong its lifespan and maintain its performance. Periodically inspect the fan duct for any signs of damage, such as cracks or warping. Clean the fan duct regularly to remove dust and debris that may obstruct the airflow. Use a soft brush or compressed air to gently clean the fan and the duct. Make sure your fan and the duct do not have any print residue on them. This will reduce airflow. Ensure that the fan is running smoothly. Replace the fan if it starts to make unusual noises or fails to operate correctly. By taking care of your fan duct, you can ensure that it will continue to improve the quality of your prints for years to come.