Drawing a Mexican Red Knee Tarantula might seem daunting, but with a step-by-step guide, it’s an achievable and rewarding artistic endeavor. This tutorial breaks down the process into manageable steps, ensuring that artists of all skill levels can learn how to draw this fascinating creature. Follow along to create your own stunning depiction of a Mexican Red Knee Tarantula.
Supplies You’ll Need for Drawing a Mexican Red Knee Tarantula
Before you begin, gather your supplies. Having the right tools will make the drawing process smoother and more enjoyable. This section outlines the essential materials you’ll need to get started.
Pencils and Erasers
A variety of pencils is crucial for achieving different effects. Start with a range of pencils, from a soft 2B or 4B for shading to an HB or H for sketching the initial outline. Soft erasers, like a kneaded eraser, are perfect for lifting graphite without damaging the paper. A mechanical eraser can also be helpful for precise corrections and highlights. Consider a pencil sharpener to maintain sharp points for detailed work.
Paper Selection

Choose paper suitable for pencil drawing. Sketchbooks with smooth or medium-textured paper work well. Avoid paper that’s too thin, as it can tear easily. Bristol paper is a good option, as it holds up well to erasing and layering. The paper’s weight also matters; heavier paper (90lb or higher) is more durable and allows for more detailed work. Consider the paper’s color; a slightly off-white or cream-colored paper can be easier on the eyes during long drawing sessions.
Reference Images
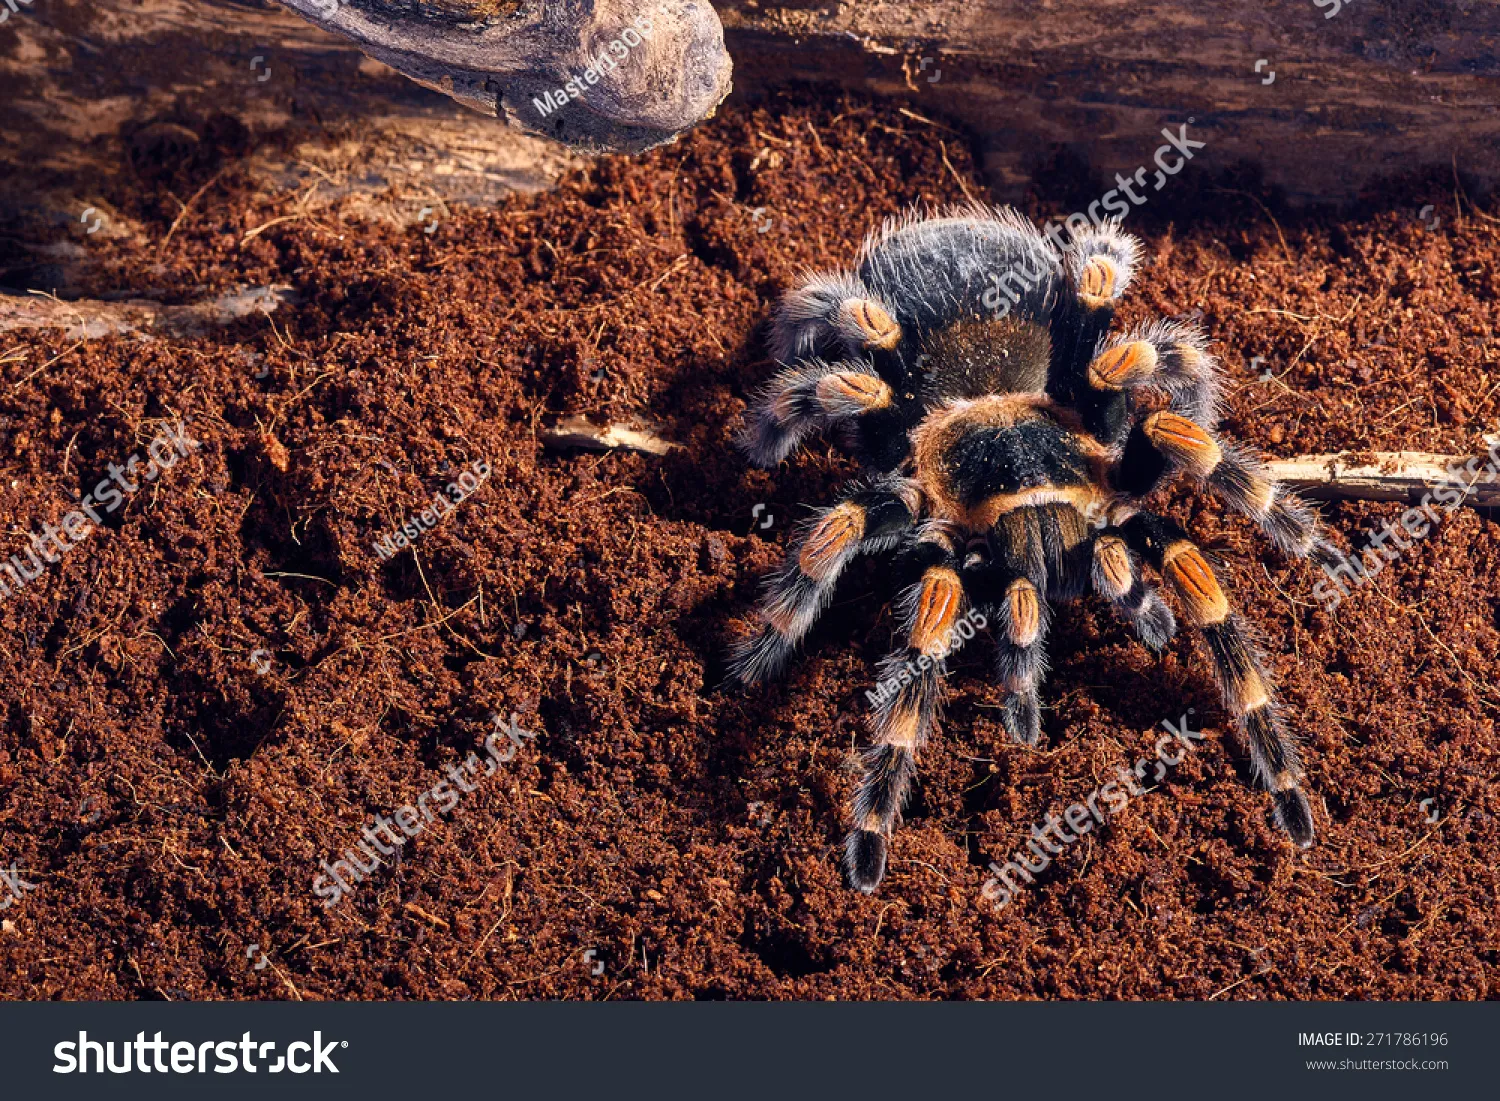
Gathering high-quality reference images is essential. Collect several photos of Mexican Red Knee Tarantulas from various angles. This will help you understand their proportions, anatomy, and details. Look for images that clearly show the carapace, abdomen, legs, and markings. Online resources like Google Images, stock photo websites, and even scientific databases can be great sources. The more references you have, the more accurately you can depict your subject.
Step 1 Sketching the Basic Shape
The first step is creating the foundation of your drawing. Focus on the overall shape and proportions of the tarantula before adding details. This initial sketch will serve as a guide for the rest of the process. Take your time and ensure the basic forms are accurate.
Creating the Body Outline

Start by lightly sketching the body of the tarantula. The body consists of two main parts: the cephalothorax (or carapace) and the abdomen. The carapace is the front part, which is roughly oval or teardrop-shaped, and the abdomen is the rounded back part. Lightly sketch these shapes on your paper, paying attention to their relative sizes and positions. Keep your lines light and loose initially so you can easily adjust them as needed.
Adding the Legs
Next, add the legs. Tarantulas have eight legs attached to the cephalothorax. Sketch the basic placement and direction of the legs. Remember that tarantulas have long, segmented legs. Don’t worry about the details at this stage; focus on the overall arrangement and the angles. Use light lines to create the basic shapes of the legs, noting how they extend outward from the body.
Step 2 Detailing the Body
Once the basic shape is established, it’s time to add details to the body. This includes defining the carapace, adding details to the abdomen, and refining the overall form. Careful observation of your reference images is key to capturing the unique features of a Mexican Red Knee Tarantula.
Defining the Carapace

Refine the shape of the carapace. Mexican Red Knee Tarantulas have a distinct shape; observe the edges and any raised areas or bumps. Add details such as the eye region (a small group of dots or shapes at the top) and any subtle markings or textures on the surface. Use your pencil to create subtle variations in tone to suggest the curvature of the carapace. Study your reference images to ensure the details align with your subject.
Adding Details to the Abdomen
Focus on the abdomen, which often has a segmented appearance. Draw the segments and any patterns or hairs that are visible. Mexican Red Knee Tarantulas are known for their reddish-orange markings. These markings can be added using light pencil strokes to begin with. Observe the shading and textures on the abdomen and use your pencil to create these effects. Remember to keep your lines light and accurate.
Step 3 Drawing the Legs
The legs are a crucial part of the tarantula’s appearance. Correctly drawing the leg structure, proportions, and the distinctive knee markings will make your drawing more realistic and recognizable.
Leg Structure and Proportions

Examine the structure of the tarantula’s legs. The legs are segmented, and each segment has a specific shape. Carefully draw each segment, paying attention to the proportions and angles. Start with the coxae (the part closest to the body), then proceed to the trochanter, femur, patella, tibia, metatarsus, and tarsus. The legs are covered in fine hairs, which can be suggested with fine pencil strokes.
Adding Knee Markings
Mexican Red Knee Tarantulas are famous for their striking red-orange markings on their legs, particularly around the knees. Carefully draw these bands on each leg. Pay attention to the shape and width of the bands and how they wrap around the leg segments. Use your pencil to create the red-orange color, using light strokes to suggest the tone.
Step 4 Adding the Finishing Touches
Refine your drawing by adding shading, texture, and other details to bring your tarantula to life. This includes using shading techniques, adding texture, and fine-tuning your work.
Shading Techniques

Use shading to create depth and dimension in your drawing. Decide on a light source and shade accordingly. Use different pencil grades (from H to 2B) to create variations in tone. Apply light shading to the carapace and abdomen to suggest the curvature. Use cross-hatching or stippling to create shadows and add texture. Blend your shading to smooth out the transitions between tones.
Adding Texture
Tarantulas have a textured exoskeleton, which you can suggest by adding subtle details. Use short, fine strokes to create the appearance of hairs on the legs and body. Add small dots or lines to indicate the texture of the carapace and abdomen. Observe your reference images to see how light interacts with the surface and use your pencil to create similar effects.
Step 5 Finalizing the Drawing
The final stage involves reviewing, refining, and adding the finishing touches to your drawing. This includes making any necessary corrections, adding a background, and ensuring your drawing looks complete.
Review and Refinement

Step back and review your drawing. Look for any areas that need improvement. Make corrections to the proportions, details, and shading as needed. Use your eraser to remove any stray marks or unwanted lines. Ensure that the different elements of your drawing are consistent and well-balanced. Take your time and make any necessary adjustments to ensure your drawing meets your expectations.
Adding a Background
Consider adding a simple background to provide context for your tarantula. You can use a light wash of gray to create a subtle shadow or a hint of the tarantula’s habitat. Experiment with different backgrounds, such as a simple desert landscape or a more detailed environment. Make sure the background complements your drawing and doesn’t distract from the main subject.
Drawing a Mexican Red Knee Tarantula can be an enriching experience for any artist, no matter their skill level. By breaking the process down into steps and using the right tools, you can produce a drawing you’re proud of. With practice and patience, you’ll master drawing this fascinating creature. Happy drawing!